
Slomins Shield Alarm System Manual: A Comprehensive Guide
Today’s date is 04/30/2026 at 09:28:17. This guide empowers you to fully utilize your Slomins Shield system, detailing installation, operation, and upkeep procedures.
Welcome to enhanced security! The Slomins Shield Alarm System is designed to provide comprehensive protection for your home or business. This system utilizes cutting-edge technology to deter intruders and alert you and, optionally, a professional monitoring center, to potential threats.
This manual serves as your complete guide, walking you through every aspect of the system – from initial setup and configuration to daily operation and troubleshooting. Before proceeding, please take the time to thoroughly familiarize yourself with the components and functionalities described within. Understanding your system is the first step towards ensuring your peace of mind.
The Slomins Shield system is built on a foundation of reliability and ease of use. We’ve strived to create a user-friendly experience, but a clear understanding of the system’s capabilities is crucial for maximizing its effectiveness. Remember today’s date: 04/30/2026, and let’s begin securing your property!
System Components & Overview
Your Slomins Shield system includes several key components working in harmony to provide robust security. These include the Control Panel – the system’s brain, managing all sensors and communication. Door/Window Sensors detect unauthorized entry points. Motion Detectors cover larger areas, identifying movement within your premises.
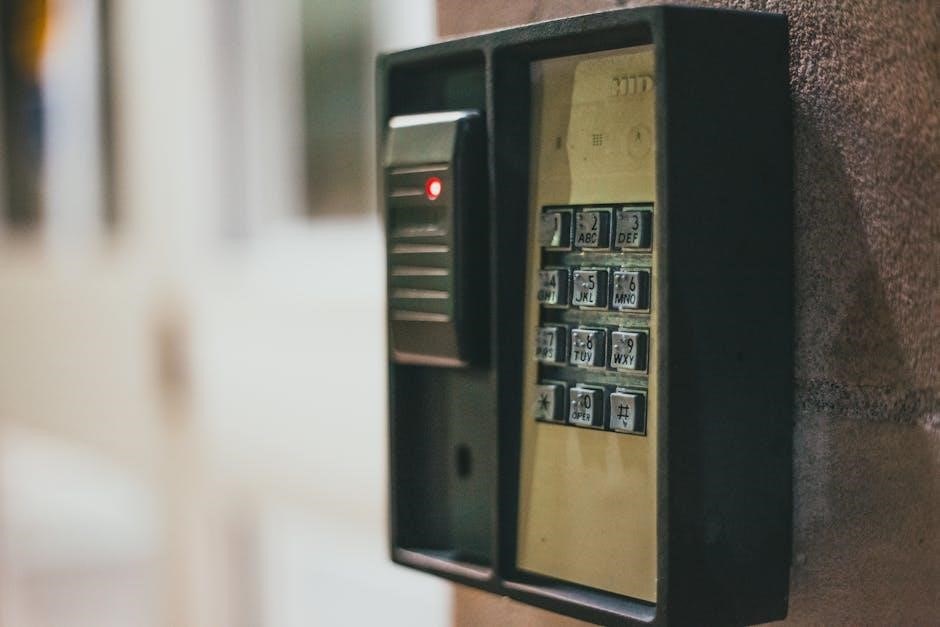
The Keypad allows for arming, disarming, and programming the system. A Siren provides a loud audible alarm in case of a breach. Remote Controls offer convenient operation from a distance. Optionally, you may have a Panic Button for immediate emergency activation.
The system communicates wirelessly between sensors and the control panel, ensuring flexible placement. The control panel connects to your home network (Wi-Fi or Ethernet) for optional professional monitoring and smartphone control. Remember today is 04/30/2026. Proper understanding of each component is vital for effective system operation and maintenance.
Installation & Setup
Beginning on 04/30/2026, carefully follow these steps to install your Slomins Shield system, ensuring optimal performance and reliable protection for your property.

Unboxing and Inventory Check
Upon receiving your Slomins Shield Alarm System, carefully unpack the box and lay out all components on a clean, spacious surface. As of 04/30/2026, verify that all listed items are present. This crucial step prevents delays during installation.
The package should include: one (1) Control Panel, a specified number of Door/Window Sensors (refer to your purchased package), one (1) Motion Detector, one (1) Keypad, a Power Adapter, mounting hardware (screws, brackets, adhesive strips), and this comprehensive User Manual.
Compare the physical contents against the packing list included within the box. If any items are missing or appear damaged, do not proceed with installation. Immediately contact Slomins Shield Customer Support at the number provided on our website or within the documentation for assistance and replacement parts. Retain all original packaging materials until the inventory check is complete and you are satisfied with the contents.
Control Panel Installation
Referencing today’s date, 04/30/2026, begin Control Panel installation by selecting a central, secure location within your home. Ensure the location is near a power outlet and offers reliable Wi-Fi connectivity if utilizing smart home integration features. Avoid areas prone to extreme temperatures or moisture.
Mount the Control Panel using the provided mounting bracket and screws. Ensure the bracket is securely fastened to the wall. Connect the Power Adapter to the Control Panel and plug it into the outlet. The panel should power on automatically.
Follow the on-screen prompts to initiate the initial setup process. This includes setting the system language, date, and time. You will also be prompted to connect the Control Panel to your home’s Wi-Fi network. A stable internet connection is vital for remote access and professional monitoring services. Double-check all connections before proceeding.
Sensor Placement & Wiring (Door/Window Sensors)
Considering today’s date, 04/30/2026, strategically position door and window sensors to maximize security. Mount the sensor and its corresponding magnet on the door/window frame and the moving part, ensuring they align closely when closed – typically within ½ inch. Use the provided adhesive strips or screws for secure attachment.
Wiring is generally wireless for Slomins Shield, but some models may offer wired options. For wireless sensors, ensure proper battery installation (refer to the ‘Battery Replacement’ section). For wired sensors, carefully connect the wires to the designated terminals on the Control Panel, following the wiring diagram included in this manual.
Test each sensor after installation by opening and closing the door/window. The Control Panel should register the change in status. If a sensor fails to register, check the battery, wiring, and alignment. Proper sensor placement is crucial for reliable alarm activation.
Motion Detector Installation & Configuration
As of today, 04/30/2026, optimal motion detector placement is key. Mount detectors in corners, approximately 7-8 feet high, covering areas with significant foot traffic. Avoid direct sunlight, heat sources (like vents), and areas with moving objects (pets, curtains) to minimize false alarms.
Slomins Shield motion detectors typically offer adjustable sensitivity settings. Configure the sensitivity level based on the environment. Higher sensitivity detects smaller movements, while lower sensitivity reduces false alarms. Utilize the ‘Zone Programming’ feature to assign motion detectors to specific zones for customized monitoring.
After installation, walk-test the detector to confirm its coverage area and sensitivity. Adjust the detector’s angle if needed. Refer to the Control Panel display for confirmation of activation during testing. Regularly test the detector to ensure continued functionality.
Keypad Programming & User Codes
Currently, on 04/30/2026, accessing the keypad programming menu requires the Master Code. This code, pre-set during initial setup, allows modification of system settings and user access. To change the Master Code, navigate to the ‘System Settings’ option within the menu. Always remember and securely store your Master Code!
Adding new user codes is crucial for personalized access. Each user should have a unique code. Assign codes through the ‘User Management’ section, specifying access levels (e.g., full access, limited access). Limit the number of users to enhance security. Regularly review and update user codes.
The Slomins Shield keypad features programmable entry/exit delays. Adjust these delays to allow sufficient time to arm/disarm the system without triggering a false alarm. Refer to the ‘System Operation’ section for details on arming modes.
System Operation
As of 04/30/2026, mastering arming/disarming modes – Away, Stay, and Night – is key to effective security. Understand alarm responses for optimal system performance.
Arming and Disarming Modes (Away, Stay, Night)
The Slomins Shield system offers three primary arming modes, each designed for different security needs. Away Mode, activated when leaving the premises, arms all sensors – doors, windows, and motion detectors – providing comprehensive protection. Ensure all occupants have vacated before engaging this mode.
Stay Mode is ideal for nighttime or when occupants remain inside. It typically arms perimeter sensors (doors and windows) while bypassing interior motion detectors, allowing free movement within the home. Customize Stay Mode sensor inclusion via the control panel settings.
Night Mode provides a heightened level of interior protection. It arms both perimeter and select interior sensors, offering robust security while you sleep. Review sensor configurations to tailor Night Mode to your specific requirements. Disarming is achieved by entering your valid user code on the keypad. Always confirm successful disarming via the system’s audible and visual cues. Remember, as of 04/30/2026, proper mode selection is crucial for optimal security.
Understanding Alarm Triggers & Responses
The Slomins Shield system activates its alarm when a sensor is triggered while the system is armed. Common triggers include forced entry via doors or windows, and unexpected motion detection within a secured zone. Upon activation, a loud audible siren sounds, intended to deter intruders and alert occupants.
Simultaneously, the system initiates a pre-programmed response. This may include notifying a professional monitoring center (if subscribed to the service), and sending alerts to designated contacts via phone call or text message. The control panel displays the zone number corresponding to the triggered sensor, aiding in identifying the source of the alarm.
False alarms can occur due to improperly installed sensors, pets, or environmental factors. Familiarize yourself with the system’s sensitivity settings to minimize false triggers. As of 04/30/2026, understanding these responses is vital for a swift and appropriate reaction to potential security breaches. Always verify the situation before contacting emergency services.
Bypass Zones & Temporary Disablement
The Slomins Shield system allows for bypassing specific zones, temporarily disabling their monitoring capabilities. This feature is useful when a door or window needs to be left open, or if a pet is roaming freely in a monitored area. Bypassing a zone prevents it from triggering the alarm, even when activated.
Zone bypassing is typically performed through the control panel or the mobile app. It’s crucial to remember that bypassed zones are not actively monitored, reducing the system’s overall security coverage. Always re-enable bypassed zones as soon as the temporary condition resolves. As of 04/30/2026, this function offers flexibility.
Temporary disablement differs from bypassing; it halts monitoring for a set duration. Use this cautiously, and always document any zone bypasses or disablements for security audit purposes. Incorrect usage can compromise system effectiveness.

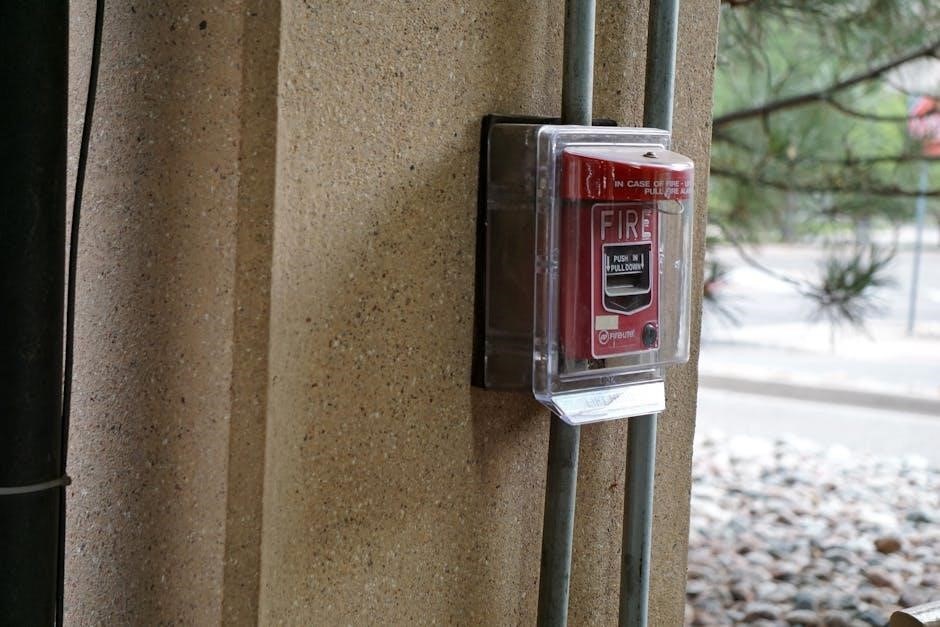
Panic Button Functionality & Emergency Procedures
The Slomins Shield system incorporates a panic button, designed for immediate emergency response. Activating this button, whether on the keypad or remote, instantly signals an alarm to the monitoring center (if subscribed) and local authorities. As of 04/30/2026, a clear, loud siren will also sound.
Upon activation, the system transmits a pre-defined emergency signal, indicating a potential life-threatening situation. It’s vital to understand that false alarms can have serious consequences, so use the panic button only in genuine emergencies – such as burglary, medical emergencies, or threats to personal safety.
Familiarize all household members with the panic button’s location and operation. Regularly practice emergency procedures to ensure a swift and coordinated response. The monitoring center will attempt to verify the emergency before dispatching help.

Troubleshooting & Maintenance
Today is 04/30/2026. This section provides solutions for common issues, guides battery replacement, sensor testing, and addresses remote control problems for optimal performance.
Common Error Codes & Solutions
As of 04/30/2026, the Slomins Shield system utilizes a series of error codes to diagnose potential problems. Error code E01 indicates a loss of communication with a specific zone; verify wiring and sensor functionality. Code E02 signals a low battery in the control panel – replace immediately to prevent system failure.
E03 suggests a tamper alert on one of the sensors; inspect for physical damage or unauthorized access. If you encounter E04, it means there’s a fault within the keypad – try resetting it or contacting support. Code E05 points to a communication error with the monitoring center (if subscribed).
For E06, check the siren’s wiring and power supply. Regularly reviewing these codes and implementing the suggested solutions will ensure your system operates reliably. Refer to the full error code list in the appendix for a comprehensive overview and further troubleshooting steps. Remember to document any recurring errors for professional assistance.
Battery Replacement & Maintenance Schedule
Effective 04/30/2026, maintaining optimal battery health is crucial for your Slomins Shield system’s reliability. The control panel battery should be replaced annually, even if no low-battery warnings appear. Wireless door/window sensors require battery checks every six months; replace when the system indicates low power.
Motion detectors typically have a battery life of 1-2 years, depending on usage. Keep a log of replacement dates for each component. A preventative maintenance schedule should include monthly testing of all sensors and the siren. Regularly clean sensor surfaces to prevent false alarms caused by dust or debris.
Consider setting calendar reminders for battery replacements. Proper battery maintenance ensures continuous protection. Always use manufacturer-approved batteries to avoid damaging the system. Disposing of old batteries responsibly is also important for environmental safety.
Sensor Testing & Calibration
As of 04/30/2026, regular sensor testing is vital for a functioning Slomins Shield system. Perform a walk-test monthly, activating each sensor individually to confirm signal transmission to the control panel. Door and window sensors should be tested by opening and closing them while the system is armed in ‘Stay’ mode.
Motion detectors require a walk-through to ensure full coverage. Calibration may be needed if false alarms occur; adjust sensitivity settings via the control panel menu. Check for obstructions blocking sensor fields of view. Ensure sensors are securely mounted to prevent accidental dislodgement.
Refer to the control panel display for test results. If a sensor fails the test, check the battery and wiring. Recalibrate if necessary, following the instructions in the ‘Zone Programming’ section. Consistent testing and calibration guarantee reliable alarm performance.
Remote Control Issues & Fixes
As of 04/30/2026, if your Slomins Shield remote isn’t functioning, begin with a simple battery replacement. Ensure the battery is correctly installed, observing polarity. If the issue persists, re-synchronize the remote with the control panel. This typically involves entering a specific code on the keypad while pressing a remote button – consult the ‘Keypad Programming’ section.
Check for obstructions between the remote and the control panel; range can be affected by walls or interference. If multiple remotes are used, test each individually to isolate the problem. A faulty remote may require replacement; contact customer support for assistance.
Avoid exposing the remote to extreme temperatures or moisture. Regularly inspect the buttons for damage. If synchronization fails repeatedly, a control panel reset might be necessary – proceed with caution and refer to the ‘Troubleshooting’ section.

Advanced Features & Customization
On 04/30/2026, unlock personalized security with zone programming, smart home integration, event log reviews, and professional monitoring options for enhanced control.
Zone Programming & Customization
As of 04/30/2026, the Slomins Shield system offers extensive zone programming capabilities, allowing users to tailor security to their specific needs. Each sensor can be assigned to a unique zone, enabling precise identification of alarm triggers. Customize zone names – for example, “Front Door,” “Living Room Window,” or “Basement Motion” – for easy recognition during events.

You can define zone types (entry/exit, instant, delay) to control how the system responds to activations. Entry/exit zones provide a grace period for arming and disarming, while instant zones trigger an immediate alarm. Delay zones are ideal for doors, offering a timed entry window. Furthermore, sensitivity levels can be adjusted for motion detectors, minimizing false alarms caused by pets or environmental factors. Advanced users can create zone groups, combining multiple zones for coordinated responses. Detailed instructions for accessing and modifying these settings are available within the system’s programming menu, ensuring a fully customized and effective security solution.
Integration with Smart Home Devices
Current as of 04/30/2026, the Slomins Shield system seamlessly integrates with a growing range of smart home platforms, enhancing convenience and automation. Compatibility includes popular ecosystems like Amazon Alexa and Google Assistant, enabling voice control for arming, disarming, and checking system status. Connect smart lighting to automatically illuminate upon alarm activation, deterring potential intruders.
Furthermore, integration with smart locks allows for remote door control and automated locking schedules. Utilize IFTTT (If This Then That) applets to create custom scenarios, such as receiving notifications on your smart watch when the alarm is triggered or automatically adjusting your thermostat when arming the system in ‘Away’ mode. The Slomins Shield app serves as the central hub for managing these integrations, providing a unified interface for controlling your entire smart home security network. Explore the app’s ‘Devices’ section for detailed setup instructions and supported device lists.
Event Log Review & History
As of 04/30/2026, the Slomins Shield system meticulously records all security events in a comprehensive event log, accessible through the system’s control panel and mobile application. This log details every arming/disarming action, sensor trigger, alarm activation, bypass, and system error, timestamped for precise tracking. Users can filter events by date, time, zone, or event type to quickly pinpoint specific incidents.
The event history provides valuable insights into system activity and potential security breaches. Regularly reviewing the log allows you to identify patterns, troubleshoot issues, and verify system functionality. The system retains a rolling 60-day history; however, professional monitoring subscribers may benefit from extended cloud storage options. Exporting event logs for record-keeping or reporting is also supported via the mobile app. Detailed instructions on log navigation and filtering are available within the ‘Settings’ menu.
Professional Monitoring Options & Contact Information
Current as of 04/30/2026, Slomins Shield offers tiered professional monitoring plans to enhance your security. These plans provide 24/7 monitoring by trained personnel who respond to alarm events, dispatch emergency services, and notify designated contacts. Basic plans include alarm verification, while premium plans offer video verification and smart home integration.
To enroll in professional monitoring, visit our website at www.slominsshield.com or call our dedicated support line at 1-800-SLOMINS (1-800-756-6467). Our customer service representatives can assist you in selecting the plan that best suits your needs. For technical support or to report system issues, please email support@slominsshield.com. Emergency contact information for local authorities is pre-programmed, but users should verify and update this information upon installation.