The Fender Telecaster’s wiring is renowned for its simplicity and versatility, offering a wide range of tonal possibilities. Understanding its circuitry is essential for optimizing sound quality and customization.
1.1 Overview of the Fender Telecaster
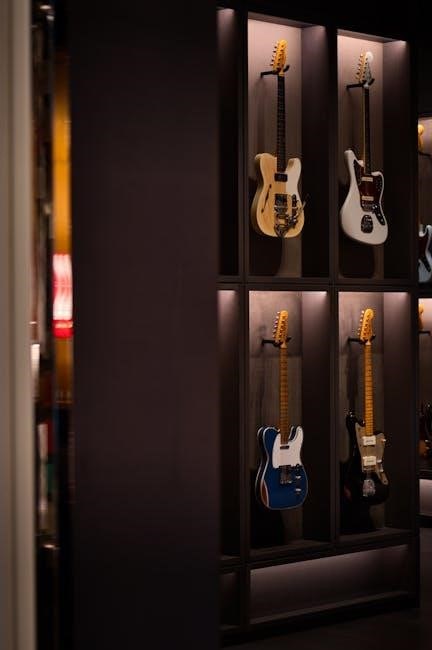
The Fender Telecaster, introduced in 1950, is one of the most iconic electric guitars in history. Known for its durability and versatility, it features a single-cutaway body, bolt-on neck, and two pickups. The Telecaster’s design has evolved over decades, blending classic aesthetics with modern enhancements. Its simplicity and twangy tone have made it a favorite among musicians across genres. Recent models, like the American Ultra II Telecaster, incorporate advanced electronics, while the Player II series offers affordable, high-quality options. The Telecaster’s enduring appeal lies in its ability to adapt to diverse playing styles, making it a cornerstone of music history and contemporary performance.
1.2 Importance of Proper Wiring
Proper wiring is critical for the Fender Telecaster to function optimally; Correct connections ensure clear signal flow, preventing hum, noise, and tonal loss. Even minor wiring errors can disrupt performance, making troubleshooting essential. The Telecaster’s circuit relies on precise configurations, such as the standard three-way switch setup, to deliver its signature tones. By adhering to Fender’s wiring diagrams and best practices, players can maintain the guitar’s reliability and tonal integrity. Additionally, custom wiring options, like coil splitting or series/parallel configurations, offer expanded sound possibilities, further emphasizing the importance of accurate and intentional wiring techniques to unlock the Telecaster’s full potential and versatility.
Standard Telecaster Wiring Setup
The standard Telecaster wiring features a three-way pickup selector switch, two pickups, and basic tone and volume controls, providing a straightforward yet versatile tonal foundation for players.
2.1 Components Involved in Telecaster Wiring
The Telecaster wiring setup includes key components like pickups, a three-way selector switch, volume and tone pots, a tone capacitor, an output jack, and the wiring itself. The neck and bridge pickups deliver distinct tonal characteristics, while the selector switch allows switching between them. The volume pot controls overall loudness, and the tone pot adjusts high-frequency response, often paired with a capacitor to refine brightness. The output jack transfers the signal to an amplifier or effects. Proper wiring ensures these components function seamlessly, maintaining the Telecaster’s signature clarity and versatility. Understanding these parts is crucial for effective customization and troubleshooting.
2.2 Understanding the Standard Wiring Diagram
The standard Telecaster wiring diagram outlines the connections between the guitar’s electronics, ensuring proper signal flow. It typically features two pickups (neck and bridge), a three-way selector switch, a volume potentiometer, a tone potentiometer with a capacitor, and an output jack. The diagram shows how the white and black wires from the pickups connect to the switch and pots, while the yellow wire from the bridge pickup grounds to the potentiometer. The tone capacitor (.047uF) filters high frequencies, allowing for tonal adjustment. This straightforward design provides the Telecaster’s classic twang and versatility, making it a foundation for both stock and custom configurations.

Custom Wiring Configurations
Custom wiring configurations expand the Telecaster’s tonal palette, offering enhanced versatility. Popular mods include 4-way switches, series/parallel options, coil splitting, and treble bleed circuits for unique sonic possibilities.
3.1 4-Way Switch Wiring
The 4-way switch wiring configuration offers expanded tonal versatility for the Telecaster. Unlike the standard 3-way switch, it provides four distinct pickup combinations, including the neck and bridge pickups in series for a fuller sound. This setup retains the classic Tele twang while adding a new dimension of tonal variety. Players can achieve unique textures by engaging both pickups in series or parallel configurations. The 4-way switch is a popular modification among those seeking to unlock additional sonic possibilities without compromising the guitar’s iconic character. Proper installation and adjustment are crucial to ensure optimal performance and reliability.
3.2 Series vs. Parallel Wiring Options
Series and parallel wiring options allow players to tailor the Telecaster’s tonal output to their preferences. In series wiring, pickups are connected sequentially, increasing output and delivering a fuller, warmer sound with enhanced midrange. This configuration is ideal for achieving a robust, humbucker-like tone. Parallel wiring, on the other hand, combines pickups side by side, maintaining clarity and articulation while preserving the guitar’s signature brightness. Each configuration offers distinct tonal characteristics, enabling musicians to explore a variety of sounds. Understanding these wiring differences is key to unlocking the Telecaster’s full sonic potential and adapting it to diverse musical styles.
3.3 Coil Splitting and Tonality
Coil splitting offers a versatile tonal expansion for Telecaster players. By engaging a push-pull potentiometer, the humbucker’s double coil is split into a single coil, delivering a brighter, more articulate sound. This feature is particularly useful for achieving vintage tones while maintaining modern playability. The coil-splitting option enhances tonal versatility, allowing players to switch between robust humbucker tones and crisp single-coil clarity. This modification is ideal for musicians seeking a wide dynamic range and the ability to adapt to various musical genres. The Player II Telecaster, for instance, incorporates this feature, enabling seamless transitions between diverse tonal landscapes with minimal effort.
3.4 Adding a Treble Bleed Circuit
A treble bleed circuit is a valuable modification for maintaining high-end clarity when reducing volume. It uses a capacitor and resistor to preserve treble frequencies, preventing tone loss. This circuit is especially beneficial for vintage-style pickups, ensuring a balanced sound at all volume levels. The capacitor value (typically 0.001µF or 0.0022µF) and resistor (1kΩ to 220kΩ) are chosen to match the player’s tonal preferences. This modification is a popular upgrade among Telecaster enthusiasts, offering a consistent, articulate sound without sacrificing the guitar’s natural character. It’s ideal for players who rely on volume control for dynamic tonal adjustments.
Advanced Wiring Setups
Active electronics, such as preamps or buffers, enhance the Telecaster’s tonal capabilities. These advanced components provide tonal consistency and expanded versatility for discerning players today;
4.1 Active Electronics in Telecaster
Integrating active electronics into a Telecaster enhances tonal consistency and versatility. A preamp or buffer improves signal strength, maintaining clarity across the entire frequency range. This setup is particularly beneficial for modern players seeking a wide dynamic range and reduced hum. Active circuits often include features like adjustable gain and EQ controls, allowing precise tone shaping. Additionally, active electronics can drive long cable runs without signal loss, making them ideal for live performances. Players like those using the American Ultra II Telecaster benefit from these advanced configurations, achieving a balanced and refined sound suitable for diverse musical genres.
4.2 Using a 5-Way Switch for Expanded Tonal Options
Installing a 5-way switch in a Telecaster unlocks a broader tonal palette by enabling additional pickup configurations. Unlike the standard 3-way switch, a 5-way switch allows for more versatile combinations, such as neck, bridge, and both pickups in series or parallel. This modification is particularly popular among modern players seeking enhanced tonal diversity. The 5-way switch can also be paired with push-pull pots for coil-splitting, further expanding the guitar’s sonic capabilities. This upgrade is ideal for musicians who desire a wide range of tones, from classic Tele twang to fuller, more complex sounds, without sacrificing the guitar’s iconic simplicity and reliability.
4.3 Push-Pull Potentiometers for Additional Features
Push-pull potentiometers offer a convenient way to add extra tonal features to your Telecaster without cluttering the control layout. These pots allow for dual-function controls, enabling coil-splitting, phase switching, or series/parallel wiring with a simple pull or push of the knob. For example, a push-pull tone pot can activate a coil-split on the neck pickup, delivering a brighter, single-coil sound. This modification is ideal for players seeking expanded tonal versatility while maintaining the Telecaster’s classic aesthetic. When installed correctly, push-pull pots provide seamless integration of advanced features, enhancing the guitar’s sonic capabilities without compromising its timeless design.
Troubleshooting Common Wiring Issues
Identifying wiring faults requires checking connections, solder joints, and component functionality. Common issues include ground wire detachment, faulty pickups, or incorrect switch wiring, all affecting tone and operation.
5.1 Identifying and Fixing Wiring Problems
Troubleshooting Telecaster wiring requires a systematic approach. Start by checking all connections for looseness or corrosion. Verify solder joints for cracks or cold soldering. If the guitar lacks output, inspect the ground wire, ensuring it’s securely attached to the bridge and electronics. Faulty pickups or a malfunctioning output jack can also cause silence. Use a multimeter to test continuity in wires and switches. For hum or noise, check the shielding of the cavity and ensure proper grounding. If the tone is inconsistent, examine the capacitor and potentiometers for wear. Addressing these issues promptly ensures optimal performance and tone.
5.2 Common Mistakes to Avoid
When working on Telecaster wiring, avoid common pitfalls like incorrect soldering, which can lead to poor connections and intermittent issues. Ensure all grounds are properly connected to eliminate hum or noise. Using the wrong capacitor value can drastically alter the tone, so verify specifications before installation. Neglecting to shield the electronics cavity can introduce unwanted interference. Avoid overtightening potentiometers, as this can damage the threads. Always follow a wiring diagram specific to your setup, and test each component before final assembly. These precautions will help maintain reliability and achieve the desired tonal results.

Resources for Further Learning
Explore recommended wiring diagrams, guides, and online forums for in-depth learning. Check Seymour Duncan, Fralin Pickups, and Fender’s official resources for trusted information and support.
6.1 Recommended Wiring Diagrams and Guides
For comprehensive learning, Seymour Duncan and Fralin Pickups offer detailed Telecaster wiring diagrams. Fender’s official guides provide step-by-step instructions. Online forums like Audiofanzine and specialized communities share custom setups. These resources ensure you explore both standard and advanced configurations effectively, enhancing your tonal customization journey.
6.2 Online Communities and Forums
Online communities and forums are invaluable for Telecaster wiring enthusiasts. Websites like TDPRI (Telecaster Discussion Page Reissue) and GuitarWorld host extensive discussions on wiring mods. Facebook groups dedicated to guitar electronics and Reddit’s r/guitar-tech offer forums for troubleshooting and sharing custom setups. These platforms provide access to expert advice, DIY guides, and user experiences. Engaging with these communities allows you to learn from others, gain insights into unique configurations, and refine your wiring skills. They are essential resources for both beginners and experienced players seeking to enhance their Telecaster’s tone and functionality.
The Fender Telecaster’s wiring journey, from classic setups to modern mods, offers endless tonal possibilities. Embrace experimentation and customization to unlock your guitar’s full potential and sound.
7.1 Final Thoughts on Telecaster Wiring
The Telecaster’s wiring is a blend of simplicity and versatility, offering musicians a canvas for tonal exploration. From stock configurations to custom mods, each setup unlocks unique sonic possibilities. The Telecaster’s electronics allow players to shape their sound with precision, whether through standard circuits or advanced modifications like coil-splitting or active electronics. Experimentation is key to discovering the full potential of this iconic instrument. By understanding and tweaking the wiring, guitarists can tailor their Telecaster to suit any musical style, ensuring it remains a timeless tool for creativity and expression.
7.2 Encouragement for Experimentation and Learning
Exploring Telecaster wiring opens doors to endless tonal possibilities. Embrace experimentation to unlock your desired sound. Whether modifying a stock setup or diving into custom configurations, each tweak is an opportunity to learn and grow. Resources like wiring diagrams and online forums offer invaluable guidance. Don’t hesitate to try new mods, such as coil-splitting or active electronics, to tailor your Telecaster to your musical style. Remember, the Telecaster’s simplicity is a canvas for creativity. Keep experimenting, learning, and pushing the boundaries of what this iconic guitar can do. Your unique sound is just a wire away!